
Let’s Start With Yogurt

You have found a source for fresh goat milk and have been drinking its sweet, refreshing goodness. And now you are looking for other ways to incorporate it into your diet. Why not start with yogurt? It’s cold, creamy and oh so good for you. Plus, it is easy to make—you simply culture the milk and in the process, add all sorts of beneficial probiotics.
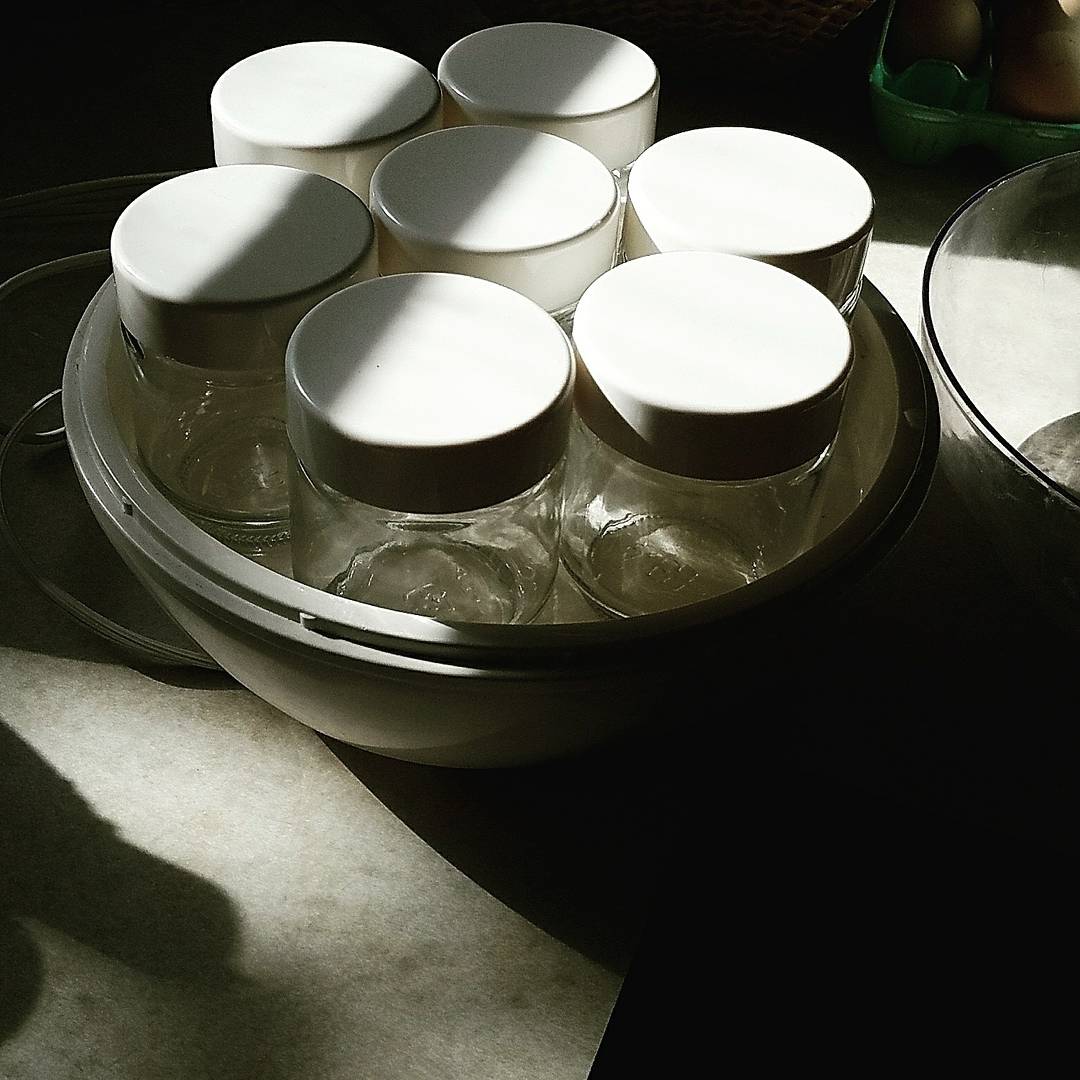
Search “making yogurt” on your computer and you will find countless recipes and methods. We eat a lot of yogurt but like you, I don’t have much extra time. I wanted a reliable, no-fuss method. Joe, my goat-herding brother-in-law, recommended a yogurt maker with 7 little cups. The accompanying recipe only called for 42 ounces of milk which left plenty to drink, so this simple-to-operate machine worked well for a few months.
As winter approached and milk production began slowing down, I needed to find a way to continue providing for our yogurt needs and began freezing milk in one batch portions. There were hurdles. First, I had to remember to thaw the milk in advance which was frustrating when I forgot. Second, although goat milk freezes well, the fat tends to separate. Although I would shake the milk to reincorporate the fat clusters, my yogurt seemed to end up runnier. I wondered: Wouldn’t it be easier to actually make the yogurt and freeze it in quart-size containers?
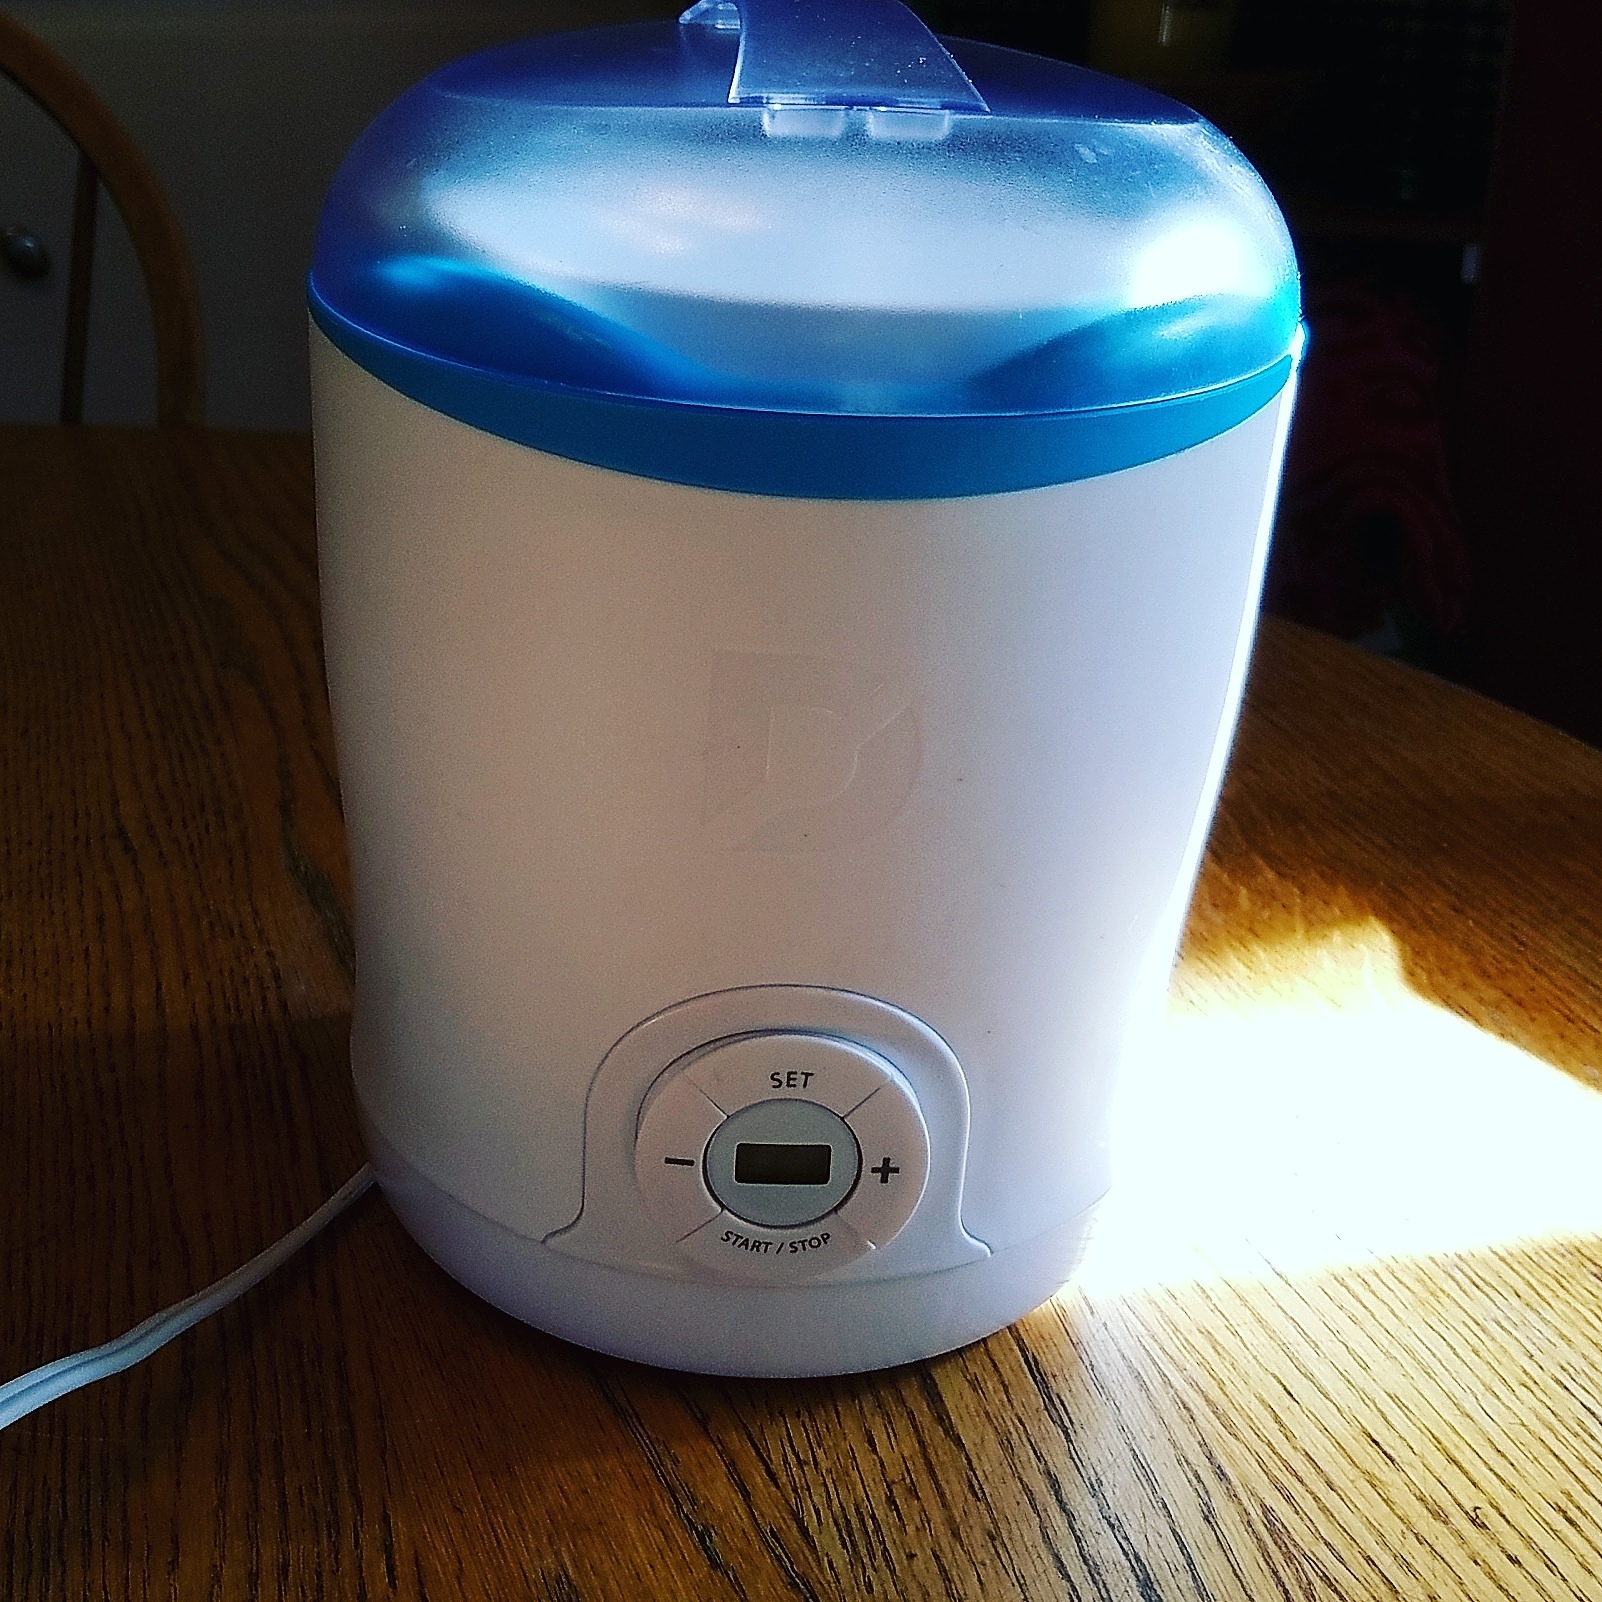
The small jars became cumbersome, so I went back to Amazon and found an inexpensive, 2-quart yogurt maker made by Dash. It has an adjustable timer that shuts the machine off when the cycle is finished. I can set it in the morning or evening and not have to be constantly watching a clock. The maker also comes with a second plastic bucket and a strainer. To make a thicker, Greek-style yogurt, you simply pour a batch of chilled yogurt through the strainer. The bonus is that this separates the highly nutritious whey, which can be used in many ways–an article for another day.
Although my new yogurt maker comes with its own recipe, I adapted the one I was already using and found that it works just as well. Before giving you my recipe, here are a few extra ingredients and tips that I have found helpful.
Dry Milk Powder Use milk powder (not non-fat instant) to thicken your yogurt. Some recipes suggest 1 cup but we are satisfied with 1/2 cup per batch. Test it until you find the consistency you like. I buy mine from an Amish bulk foods store but you should be able to get milk powder at many local stores or even online.
Culture Yogurt, like sourdough bread, needs a starter. Some people use a yogurt starter or plain store-bought yogurt. I use an actual yogurt culture from www.getculture.com. We like their Mild ABY-2C culture the best but they also offer one that creates a tangier yogurt. You only need a tiny amount–1/8 tsp. per batch, so a small bottle of powdered culture lasts for quite a few batches.
Flavorings I make two flavors of yogurt: plain and vanilla. Plain yogurt serves as a substitute in any recipe that calls for sour cream or buttermilk so it is nice to keep on hand. Our “eating” yogurt is vanilla. Just as I am ready to transfer my yogurt into the maker, I add a tablespoon of pure vanilla. When we are ready to eat it I can add whatever fruit, granola, and sweeteners I desire.
Raw or Pasteurized? You will notice that my milk is never heated higher than 115 degrees. This is because I choose to keep our yogurt raw to protect any friendly bacteria that would be destroyed by heat. If you prefer to pasteurize your milk, heat it to 185 degrees first. Then allow it to cool to 115 degrees before adding the culture. You still need to add the dry milk at 105-110 degrees. I recently read that heating it to 185 degrees allows the yogurt to thicken. Although we are satisfied with our yogurt, if I wanted it to be truly Greek style, I would probably need to pasteurize it.
Thermometers I started by using a candy thermometer and liked it because it came with a clip for the pan. However, I found it difficult to read. The style I like best has a thin probe and a digital display but no clip. Now I use both. The candy thermometer lets me know when I am getting close–the probe gives me perfect accuracy.
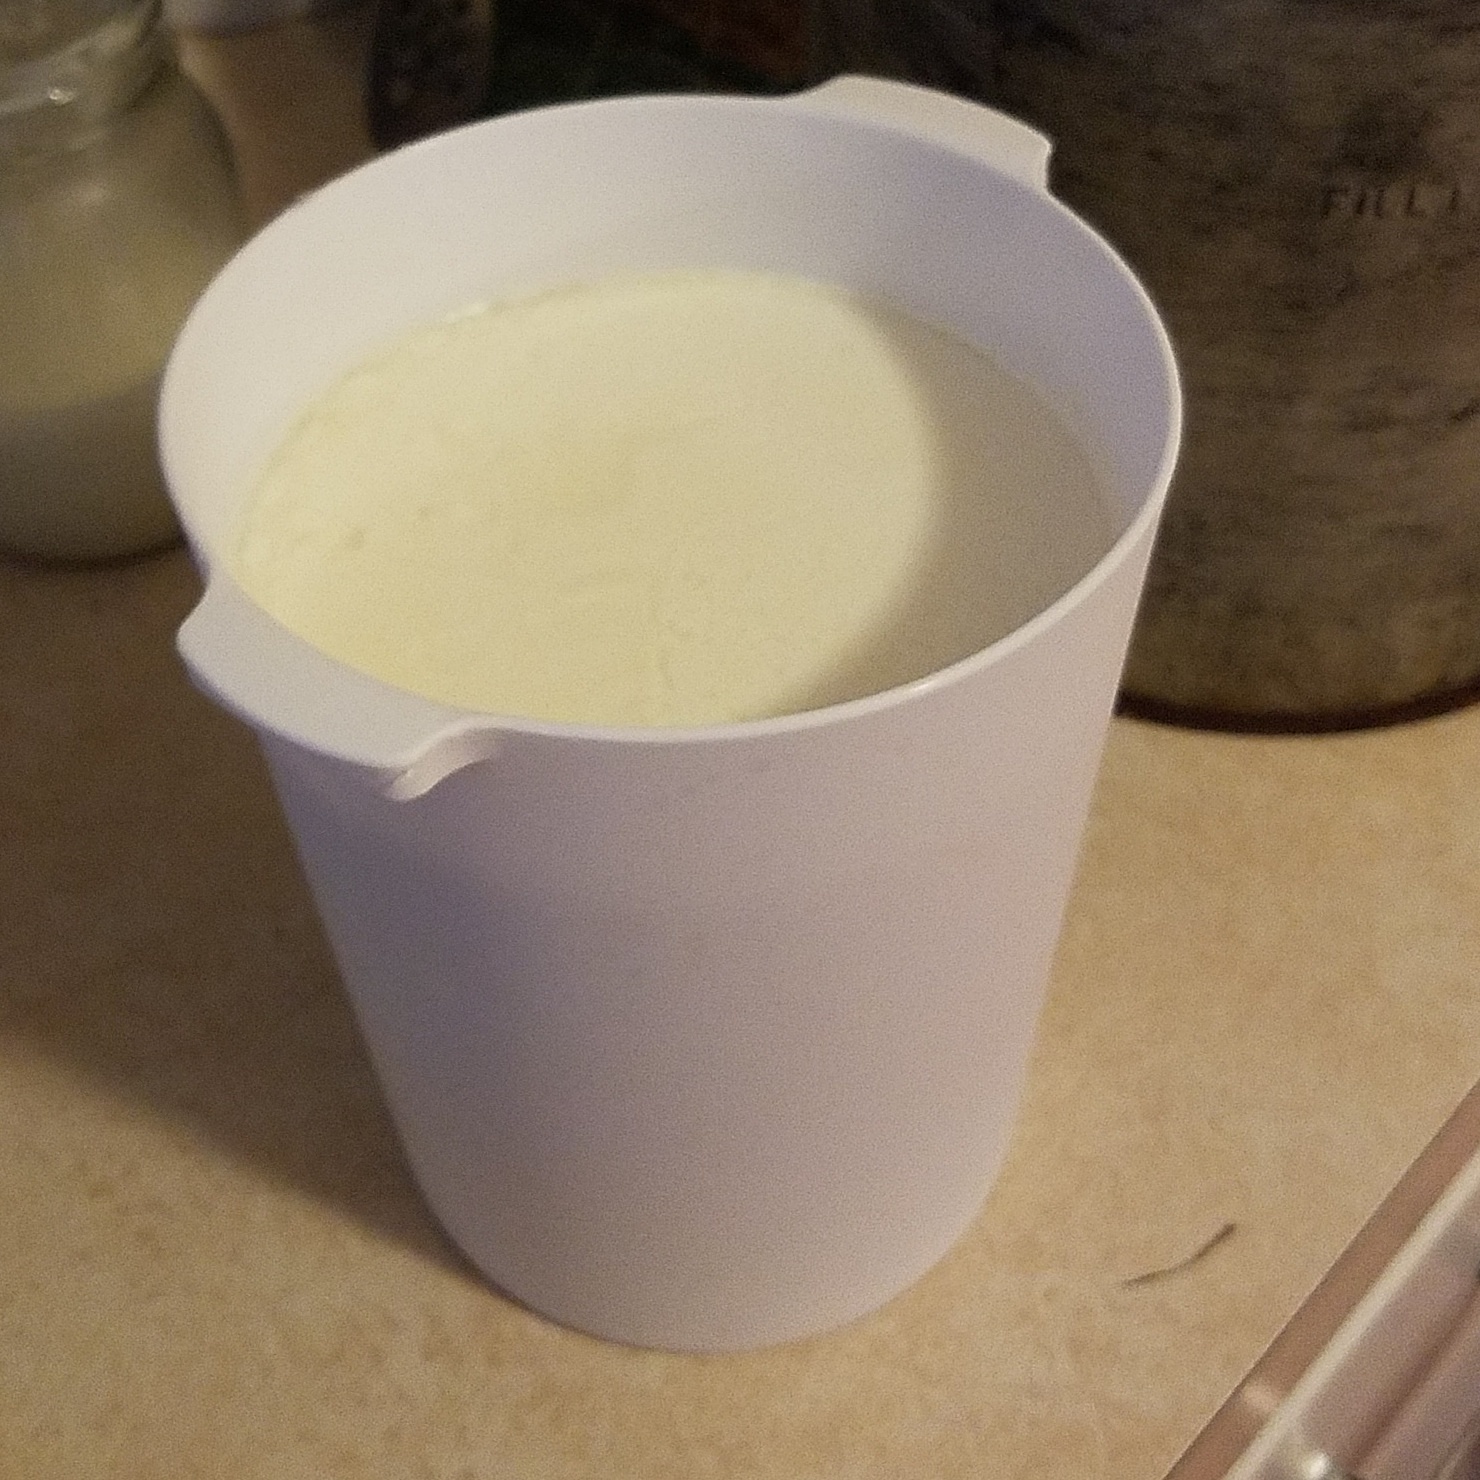
Cultured yogurt, ready to be eaten or strained
And now that your taste buds are salivating, here is my recipe:
Robin’s Yogurt
5 1/2 cups of raw milk in a heavy bottom, non-aluminum pan
1/2 cup powdered milk
1/8 tsp. culture
1 tablespoon of pure vanilla if desired
Slowly heat the milk to 105-110 degrees. Remove from the heat and quickly stir in the powdered milk. Continue heating to 115 degrees. Remove from heat and add the yogurt culture, stirring thoroughly. Add the vanilla if desired and pour the milk into your yogurt maker. Do not add fruit or sweeteners at this point–wait until just before serving. Set your timer or plan on culturing your yogurt for 8 1/2 – 9 hours. The longer you culture, the tangier your yogurt will be so experiment to find out what suits you. After culturing, chill your yogurt for a few hours. It will be fairly runny, which is great for sauces or soup. If you want an thicker consistency, strain your yogurt after chilling.
This recipe will make almost 2 quarts of yogurt, however after straining, it will likely yield about 2 1/2 cups.
The versatility of homemade yogurt is only as endless as your imagination. Plain, sweetened, added to a smoothie, used in a sauce or soup, it is comforting to know that you are adding value to your milk purchase and nutrition to your diet.

Goat milk yogurt with plums and ancient grain granola


Leave a Reply
Want to join the discussion?Feel free to contribute!