Eggonomics 101

I suppose I was like most Americans.  When we needed eggs, day or night, summer or winter, I made a trip to the glass-covered refrigerator near the back of my grocery store.  I didn’t think much about how those eggs got there in the first place.  Nor did I worry about their availability.  Then we bought our first chickens and I learned a few things.

Did you know?

-Unless chicks are desired, hens do not need a rooster to lay eggs.  God just created them to do their job…lay eggs.

-Hens do not lay an egg every day…their bodies simply are not designed to produce 365 eggs.  Even if they could, creating an egg is about a 26-hour process.

-For most birds, production is highest in spring and fall.  Heat, cold, and strange weather patterns throw them off course and can cause them to stop laying altogether.

It’s easy to understand why large egg producers turn to automated, highly controlled systems to provide American consumers with the vast quantities of eggs that are consumed.  For those who prefer local eggs from a smaller farm this may also help you understand why your farmer may simply say, “Sorry, I have no eggs today.”

On Love Led Farm, we are entering our notorious summer “eggonomic slowdown.”  There are days when David and I sternly ask our hens, “Girls, where are the eggs?”  But although it is easy for us to grow impatient with our feathered friends, we are learning to adopt a more patient, understanding attitude.

For in nature, things work best when they are allowed to follow the plan designed for them.  And maybe when we do have the pleasure of eating a delicious free-range egg, we will more deeply appreciate what it took to appear on our plate.

Meanwhile…

Our meat birds are looking mighty fine!  Our second flock of 100 chicks will arrive next week, and we will order the third flock next month.  If you haven’t placed your orders, you will want to get hopping.  Summer is flying by–don’t miss your chance to fill your freezer with our famous, Love Led Farm chicken.

Warmly,

Rainy Days and Sunshine

It rained again this morning, for the “bazillionth” time.  Okay, maybe that isn’t a word but once again, Allie and I sloshed our way through not-so-tiny rivers that are running all over the farm.  But in the past few days, there has been a difference.  Today the clouds unfurled, revealing blue skies and sunshine.  And here I sit in short sleeves and sandals, anticipating temperatures that promise to be comfortable.  Our cold spring is waving good bye and a warmer, friendlier summer is smiling at us.

I do not believe I am the only one rejoicing.   Last night, the goats eagerly scampered up and down our hill, gobbling up the tall, sweet-tasting grass.  The hogs are creating new mud baths and are now more commonly found outside of the barn than in.  The sheep are more easily ushered out the door to spend the afternoon in the pasture, and the meat chicks are peeping their pleas to be allowed outside–very soon, guys, but first let’s see a few more waterproof feathers.

Almost ready for the great outdoors

Lois learns about the sweet taste of spring grass.

I share all of this for fun and to remind you that as swiftly as summer approaches, it will be gone.  So before you pack that beach bag and camping gear, heed this gentle reminder:

Don’t forget to order your meat chickens.

We still have plenty but they will sell out quickly.  Whether for barbecuing this summer or soothing soup next winter, make sure your freezer is filled with the best free-range, gmo-free chicken you’ll ever taste.

And for a fun summer spot to bring your children, why not plan a visit to Love Led Farm?  Contact us, and we will be happy to arrange a friendly tour.

Enjoy the season, friends, and let us answer any questions you have about our farm and products.

Warmly,

Considering Goat Milk?

They’re here!  Two bouncing bundles of happiness were born a little over a week ago to Holly, Mama Goat.  And just like that, I breathe a sigh of relief and life gets busy.  Milking season has begun.

Goat milk...is it the right choice for you and your family?  In depth scientific information is not the purpose of my blog.  Other websites can provide those facts and figures.  I will say that one of the most helpful resources I have found is http://www.everything-goat-milk.com.  Among the many great recipes and ideas,  you will find two well-written articles on health and nutrition which will provide a wealth of information on the benefits of goat milk.

What I will do for you is share my personal experience.  As a child, ear infections, upper respiratory infections, and congestion were constant companions.  I had allergies and while I wasn’t really overweight, I always felt a bit chubby.  Some issues I grew out of, while others remained with me into adulthood.

Quite a few years ago, health professionals including my sister, began to draw the connection between dairy products and chronic illnesses such as allergies and inflammation.  Cindy’s whole family had trouble with dairy and they eliminated most of it from their diet.

Then I had a daughter who was born with an obvious lactose intolerance.  Being a nursing mom, rather than giving up breastfeeding, I chose to avoid all dairy.  Guess what?  Not only was she immediately more comfortable, but to my surprise I noticed that my own chronic congestion had significantly decreased.  I felt better than I could remember.  Except for cheese and occasionally ice cream, cow milk became history.

In the years to follow, I began reading about the human body’s ability to tolerate goat milk more readily than cow milk so by the time I began milking my own does, I was ready for the big test.  Would my health issues return?

The results?  No congestion.  No sinus issues.  Unexpectedly, I also found that on raw, full-fat goat milk my digestive system improved.  I lost weight, and my skin became healthier.

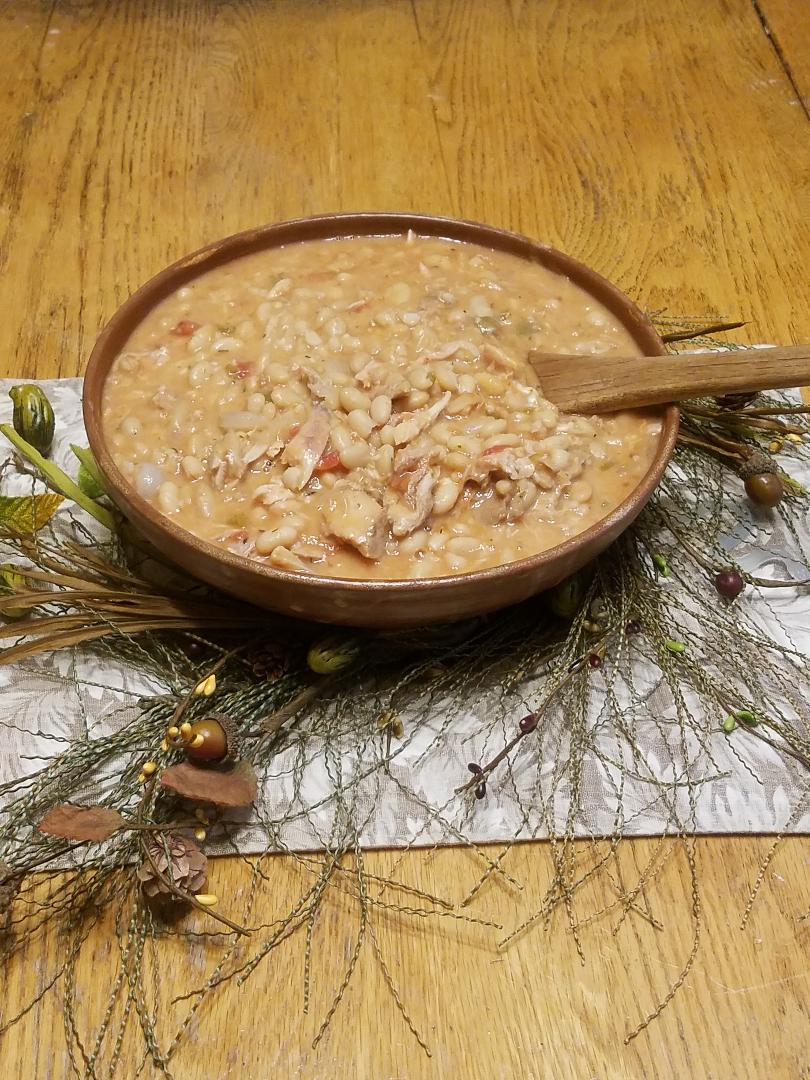
Now, I begin many days with home made goat milk yogurt (heavenly) and enjoy cold, sweet goat milk with my meals.  I use it in my coffee and culture it into a variety of cheeses.  And when I have to endure dry season before the new babies arrive, I can actually tell the difference in my body:  less energy, and I just don’t feel as good.

Once again, this was my personal experience.  Yours may be vastly different, so before you make the switch be sure to do your own research, especially if you have true milk allergies or will be giving it to young children. 

A personal tip?  when you do make the switch, take it slowly as your body learns how to metabolize the smaller fat molecules and new helpful enzymes.

Here are some other things to consider:

*Are you willing to drink raw milk or do you prefer it to be pasteurized?  Once again, research carefully.   There are pros and cons to both.

*If your choice is raw, make sure you understand your state’s laws regarding raw milk.  To obtain that information, take a look at Farm to Consumer Legal Defense Fund http://farmtoconsumer.org.   On their website you will find a helpful, interactive national map, called “Raw Milk Nation” that shows and explains each state’s regulations.  The map is often updated as states continually review and revise their laws.  Contact FCLD’s friendly, responsive staff for answers to any questions you have.

*The quality (and safety) of milk, especially raw, is based on these factors:  the environment and health of the goats; the diet of the goats; and the handling of their milk.  Before signing any agreement, visit the farm and ask questions.  Are the goats clean and housed in a healthy environment?  Are they given any hormones or medications that would affect the milk?  Are the goats regularly tested for mastitis and any other diseases?  What are they fed?  What about the milking station–is it clean?  What happens after milking?  How is the milk handled?  Are you responsible for cleaning and sterilizing your own jars?  If not, how are they cleaned?

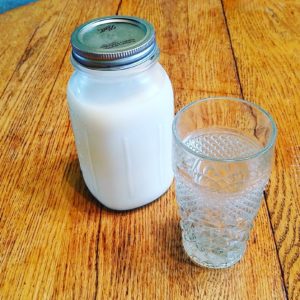
*Ask to taste a sample of the milk.  Does it have an “off” odor?  Is the flavor too “goaty?”  Fresh, milk if handled correctly, will be very white and will taste sweet.  When kept cold, it should last at least a week before souring.

*Be prepared to abide by the rules.  Please do not ask the farmer to compromise on state regulations.  In Michigan, I cannot bring the milk to you and you cannot ever resell it.  Most farmers, including myself, work hard to gain respect from the state and from their community.  To be allowed to do what we love, our standards and practices must be above reproach.  Be a part of the solution, not the problem.

Goat milk...are you ready to try it?  I still have one or two herd shares available for 2019.  If you aren’t quite sure, ask me for a sample and by all means come and visit the babies.  They are pure happiness that we love to share!

Warmly,

Pig Tales

Oliver burst into our kitchen and flung his red and blue wallet on the countertop.  “Here’s all my money!” he triumphantly announced.  With those words, he carefully withdrew the dollars he had been earning and saving since last year.  It was more than enough, so we counted out the change and he tucked the $75 dollars he would need back into his wallet.  The Day was finally here!  It  was time to ride with Papa to the Farmer John’s house to choose and buy his new pig.

An hour later, an elated six-year-old returned and with Papa’s help, introduced this year’s pork makers to their new home.  Several hours later, Oliver’s parents convinced him that it really was time to go home and I assured him that he could visit and work with the pigs any time he wanted.  And he will be back…as often as he can talk a parental driver into making the trip.

Our baby pigs have arrived!  And yes, they have names.  Oliver’s black hog is Noodle, Arya wanted to name hers Peppa–thankfully one just happened to be a girl–and a phone call later, we learned that Eisley wanted to name the third black and white one, Panda.  How appropriate!

Panda and Peppa

At Love Led Farm, we do things a bit differently.  Ignoring the advice to never name your animals, we choose to allow a more personal relationship–except perhaps with the chickens.  Each family member, down to the very youngest, knows that the purpose of our farm is to raise food for other people which means that most of the livestock will be gone by winter.  Still, we pet and talk to the lambs, leash walk the baby goats, and a certain little boy lives his summer climbing the fence and running through the pasture with his pigs.

Oliver and Noodle


At Love Led Farm we provide meat, eggs, goats for herd shares, and a memorable place for your family to experience and enjoy.  Visit us and let us know what we can provide for you.

Warmly,

Herd Shares Ahead

In less than a month, our quiet barn will be filled with the sounds of babies:  piglets, lambs, and kids–goat kids that is.   I promise to post pictures but for the next 2 posts, let’s talk about those goats.

After a rather tumultuous year, I ended up keeping only the 2 healthiest mama goats.  With the help of time and the advise of a seasoned Amish farmer, we solved a difficult barn problem and are eager to begin a fresh new year and a fresh new herd.  Both girls are due at the beginning of April which means their milk should be available to our farm friends around the middle of the month.

Does that mean you just can pull up to our farm store and grab a bottle?   Well, not exactly.

In Michigan, folks like you are able to “own” milk by sharing my goats with me through a herd share.

Here’s how it works:  You sign two contracts.   The first says you are buying part of a goat, the second agrees that I will perform the duties of caring for and milking your goat.  What you get from this deal is a weekly share of milk.  Here’s the technical information:

Under Michigan’s policy, established in 2013 by the Fresh Unprocessed Whole Milk Workgroup, there must be a dated, written contract between me and each shareholder that covers at least these key points:

  • We must be able to directly communicate at any given time.
  • The milk can only come from our farm, and shareholders must come to the farm for their milk.
  • I am not required to be licensed and the state does not inspect our farm.  In return, the contract covers only the raw milk.
  • The milk cannot be sold to a third party.
  • Our contract cannot in any way imply the sale of milk but must be written in a way that indicates the milk is already owned by the shareholders–they are just picking it up.

So, what if you have heard and studied the many benefits of fresh, delicious goat milk but are skeptical of its taste?  Oh, I can certainly help with that!  Just ask, and I will gladly give you a sample to try.

In my next post, we’ll dig a bit deeper into goat milk.  Why in the world would you choose it over cow milk?  What should you consider before signing those contracts?  Join me for that discussion, but in the meantime, if you have any interest in a herd share, go ahead and contact me–they are limited in number and will go quickly.

Warmly,

Chilly Days

Winter arrives tonight with a forecast of snow.  Sounds like it’s time for some chili.

When it comes to chili, some like it hot, some like it not!  Personally, I like chili with flavor.  Red chili is certainly delicious and some day I will share my recipe.  But today, let’s try something different.

Spicy White Chili is made with leftover chicken and lots of cheese.   It’s so easy!  Imagine its aroma coming from your crockpot at the end of a long, cold day–and the flavor!  This dish will quickly become a family favorite.

Slow Cooker Spicy White Chili

What You Will Need:

4 cups of leftover chicken

1 48-oz jar of Randall’s Navy Beans (you’ll find this in the canned bean section)

8 oz. salsa (I use a medium, chunky style)

2 tsp. cumin

2 cups shredded Monterrey Jack cheese

How to Make It:

Combine the first 4 ingredients in a crock pot and cook on low 4-6 hours.  Add the cheese 30 minutes before serving–just long enough for it to melt.  Stir thoroughly to combine.

Makes 4-6 bowlfuls.

Terrific Tips:

*I used leftover turkey in the last pot that I made.  It was delicious–a great way to use up some of the Big Bird this month.

*Randall’s makes an organic version of their Navy Beans–just as good, and better for you.

*For a complete meal, serve with tortilla chips, salsa, and a salad.

Soup Week

We arrived home from a relaxing vacation to discover that the thermostat on our enormous upright freezer had stopped working.  This is the freezer into which I had been faithfully stocking this summer’s fruits, vegetables, and yes, meat—lots of meat.  Thankfully, almost everything was still frozen.  And we had purchased a chest freezer this summer in which to store chickens for customers.  So until the repairman could visit,  David and I worked in tag team fashion, stuffing both the chest freezer and the kitchen freezer with everything that would possibly fit.

However…

Throughout the year, I had accumulated a nice collection of bones and bits of leftover meat from chickens, hams, and even a turkey.  The idea was that when the cold weather returned, I could use these nuggets of frozen inspiration to fill the house each week with the fragrance of warm bone broths and soups. Now, without even an extra inch in which to store them, I turned to Plan B.

“Why not spend a week making the soups now?” I thought. “By freezing them in meal-size portions, one dinner each week will be a simple matter of heat and serve.  Plus, what a great way to have a stockpile of soups ready to share with others at any time.”

And so this week has been all about soup.  Through the chilly months to come, I will gladly share with you from the collection of recipes I have accumulated over the years.  Each will feature meat that we raise on Love Led Farm.  Each has been tested and approved by Critic Number One–my husband.  And, with each recipe I will share some tips for making it easier and healthier.

So, grab your cutting boards and soup pots.  It’s time to make soup!

Today, let’s start with Basic Chicken Soup.   Uncomplicated, soothing to the body, and so good for you–it’s comfort in a bowl.

Chicken Soup with Vegetables and Noodles

What to Put In It:

The bones and meat from a roasted chicken

2 large stalks of celery, rough chopped

1 medium onion, rough chopped

2 or 3 medium sized carrots, sliced

2 tsp. minced garlic

1 tsp. thyme

1 tablespoon salt (you can reduce this if your chicken was already heavily seasoned)

1/2 tsp. pepper

water to cover–6 to 8 cups

1 large package of frozen mixed vegetables or 4 cups of fresh, chopped vegetables

2-4 cups of uncooked noodles (depending on how “noodly’ you like your soup.)

How to Make It:

Load the chicken, celery, onion, and carrots into your stock pot.  Sprinkle the garlic, thyme, salt, and pepper on top and cover with water.

Bring the liquid to a boil and then cover and simmer for until the meat falls off of the bones–1 or 2 hours.  Turn off the heat and allow the soup base to cool.  Pull the meat off of the bones.  The bones get discarded; the meat goes back into the pot.  Add the remaining vegetables.  Bring the soup back to a boil, and then lower to a simmer until the vegetables are tender.  Add the noodles 10-15 minutes before serving.

Terrific Tips

*Making Broth.  Since chicken broth is a basic ingredient for a lot of other soups and casseroles, I always keep several jars in the freeze. Instead of finishing the soup, I strain the liquid and discard the meat and vegetables.  Then, I cool the broth in the refrigerator so I can skim off the fat before transferring the golden liquid to freezer containers.

*Use Your Crockpot.  It’s so easy!  After we have enjoyed one of “Robin’s Roasted Chickens,”  I transfer the bones and juices right into my largest the crockpot.  I add the onion, celery, carrots, seasonings, and water, and let it cook overnight.   On soup day, simply add the rest of the vegetables and cook it on low during the day, adding the noodles towards the end.

*Instead of Noodles, Try Zoodles.  We like to add vegetables wherever possible.  So instead of noodles in our soup, I make zoodles.  I use 1 large zucchini and my spiralizer to create mine but they are also available in the frozen vegetable section of your store.  Some people like to salt and drain them before adding them but for soup, I have not found this necessary.  Just add them to the simmering soup about 10 minutes before serving so the zoodles can cook thoroughly, and since they tend to get mushy, don’t overcook them.

Soup season is here!  It’s time to stir up something warm and wonderful for your family.  What will be in your soup pot this week?


The Chickens Have Flown

Just as summer has quickly drawn to a close, our summer meat birds sales have quickly ended.  Hopefully, you have tucked a few of them into your freezer for the months ahead.

Now it’s time to start thinking of ways to use that delicious meat.  Since our hot summer is finally cooling into a more comfortable fall, let’s turn on our ovens.  Roasted chicken and one-pot meals are great for both family and friends.  A few months ago, we talked about how to roast the perfect chicken (See, “Robin’s Roasted Chicken”).  Now let’s start learning how to use the leftovers.

My husband loves Mexican food–the hotter the better.  I prefer a milder meal.  My Chicken Enchiladas are a dish we can both agree on–enough heat for his spicy palate, but plenty of cheesy chicken for me.   Try them and see what you think.

Chicken Enchiladas

The Ingredients

1 medium chopped onion

1 tsp. minced garlic

3 tablespoons of chicken broth

1 tablespoon flour

1 tablespoon cornstarch

4 oz. can of chopped green chilies

14 oz. of chicken broth

2 cups cooked, shredded chicken

10 oz. can of diced tomatoes with chilies

2 cups shredded mozzarella, divided

2 cups of sour cream

10 flour tortillas

In a saucepan, soften the onion and garlic in 3 tablespoons of chicken broth.  Add flour, cornstarch, green chilies, and 14 oz. chicken broth.  Cook over medium heat, stirring frequently, until thickened and bubbly.  Add the chicken, and remove from the heat.

In a large bowl, combine 1 cup of mozzarella, the tomatoes with chilies, and the sour cream.  Now add the chicken mixture and mix thoroughly.  This will be the filling for your enchiladas.

Spoon some filling into each tortilla and place seam side down in a lightly oiled baking dish.  Pour any remaining sauce over the tortillas and sprinkle the second cup of cheese on top.

Bake at 350 degrees for 20-30 minutes.

To make this Mexican comfort food a bit healthier, I use arrowroot instead of cornstarch and I substitute plain, goat milk yogurt for the sour cream.  I have also found tortillas that are lower in carbs and even some that are gluten free.

This recipe makes enough bubbly goodness to easily please 8 – 10 people.  Serve it with chips, salsa, and a bit of salad for a fiesta of flavor.


Making Cheese

Our dynamic duo, Holly and Edith, have been producing gallons of sweet, refreshing milk for us this summer.  Thanks to them, we have more than enough to satisfy our own needs and those of our herd share participants.   And so I have been practicing my culturing and cheese making skills.  Buttermilk, yogurt, several flavors of Chevre’, and jars of Feta with kalamata olives now fill our extra refrigerator and freezer in anticipation of the dry months when the does’ bodies need to rest.

Recently, I discovered a new cheese to try.  Some call it Paneer, some spell it Panier.  Either way, you’ll find it typically in Indian and Mexican recipes.  Paneer is a bland, almost flavorless cheese that can be used as a protein substitute for meat.  With the consistency and properties of tofu, this cheese adds a nutritious boost to many dishes while absorbing the flavors of sauces and other ingredients.

And guess what?  No soy! It’s made of easy-to-digest goat milk.

Do you have a vegetarian friend or family member?  Use this as a meat substitute in their chili or spaghetti sauce.  Add it to tacos or curry for an easy, meatless protein.  I recently used Paneer in lamb meatballs which baked in a fragrant, curry sauce.  Delicious!

Paneer is easy to make and can be adapted to whatever amount of milk you have on hand.  It calls for two ingredients:  milk and white vinegar.  That’s it!

Now, here’s how to make it:

The Equipment:  a heavy bottom pan (I like a double boiler), a thermometer,  food grade cheese cloth, and a cullender or strainer

The Ingredients:  1/4 cup of white vinegar for each  gallon of milk that you are using, and of course, raw milk.  Although I haven’t tried it, I am sure you could also reduce the vinegar for smaller amounts of milk.

Gradually heat the milk to 185 degrees, stirring frequently so it won’t scorch on the bottom of your pan.  Hold that temperature for 10 minutes–using a double boiler makes this easy.  Then pour in the vinegar and stir thoroughly.  The milk will begin curdling and coagulating almost immediately.  Let it sit for 30-40 minutes or until it cools.

Set the cullender over a large bowl or pan and line it with a double layer of cheese cloth.  Then carefully pour the milk/cheese curds through the cheese cloth.  Now tie the ends together to form a bag and allow the cheese to drain for at least 12 hours. As you can see, I hang mine from the knob of a kitchen cabinet.

When the whey has drained off, the cheese can be sliced, cut into cubes, or crumbled.  I divide mine into 1 pound portions to freeze for winter, making it easy to substitute for a pound of meat.

And now it is time for your imagination.  How could you use Paneer?  Smoothies?  Stir fry?  In a soup?  Why not!

As far as the goat milk to make it with…we still have herd shares available through December/January.  Contact me if you are interested in cold, fresh milk for your family.


Dying Brown Eggs

Will I ever outgrow the fun of coloring Easter eggs?  Not as long as I have family around.  Even after the girls left home, one or more of them would gather around the table a few days before Easter to plunge 2 dozen boiled white eggs into a rainbow of colors.  White eggs?

The breeds of hens that I raise lay brown eggs.  And  like most people, I assumed that dying them would be a problem.  So each year, I have dutifully made my way to the supermarket’s egg display to buy my sale-priced, 2 dozen, white eggs while my hens produced dozens of beautiful eggs–mine for the taking.  Not this year.

I recently read an article on dying brown eggs and decided to give it a try.  I purchased the same cheap dye kit that we have always used and hard boiled the eggs just like always.

Here are the results.

Are you surprised?  Me too!  The colors are actually more vibrant and have a beautiful sheen.  Thinking that brown eggs might need a longer soaking time to absorb the color, I left the first 6 in the color cups for about 5 minutes; the second 6 for only 2 or 3 minutes.  There was no noticeable difference.

As my husband admired the eggs, he asked the question that is on all of our minds:  “So with white eggs being less than a dollar and brown eggs being $3.50, why would anybody want to spend the money to dye them?”   And, if all they will be used for is an egg hunt, okay, I might agree.

But I want to eat these eggs, while maintaining our healthy food choices. Deviled eggs, egg salad, dipped in a bit of salt, we love hard-boiled eggs.   Yes, I want to be able to have my colored egg and eat it, too!  This year I have learned that I don’t have to compromise which makes me feel pretty good about serving them to those I love.

Happy Easter, Everybody!  Remember…the holiday isn’t about a bunny.  It’s about a Lamb.